Explore Power BI workspace permissions and roles with this in-depth guide. Learn how to set up, manage, and optimize access for enhanced data security and collaboration. Dive into real-world examples and best practices to master Power BI workspace management today.
1. Introduction
Power BI has transformed the way businesses handle data, offering powerful tools for data analysis and visualization. Central to managing and sharing these valuable insights is understanding Power BI workspace permissions and roles. This article delves into the intricacies of Power BI workspace permissions, providing a comprehensive guide on how to effectively set up and manage roles, ensuring secure and efficient access to data reports and dashboards.
2. Understanding Power BI Workspace Permissions and Roles
Power BI, Microsoft’s interactive data visualization tool, enables users to create, share, and collaborate on data reports and dashboards. At the heart of this collaboration are Power BI workspaces, and understanding the permissions and roles within these workspaces is crucial for effective data governance and security.
Power BI Workspaces: An Overview
Power BI workspaces serve as containers for dashboards, reports, datasets, and other Power BI content. They facilitate collaboration, allowing teams to work together on data analysis projects. Workspaces come in two types: My Workspace, a personal workspace for individual use, and Shared Workspaces, which are designed for collaboration among multiple users.
Roles and Permissions in Power BI Workspaces
Power BI provides four distinct roles within workspaces, each with different levels of access and permissions:
- Admin: Admins have full control over the workspace. They can add or remove members, edit workspace settings, and have full access to all content within the workspace. Admins can also share content, publish apps, and manage permissions.
- Member: Members can view and edit content within the workspace. They can also create and publish content, but they do not have the ability to manage workspace settings or permissions.
- Contributor: Contributors have similar permissions to members, with the main difference being that they cannot delete content created by others. They can edit, view, and create content within the workspace.
- Viewer: Viewers have read-only access to the workspace. They can view dashboards, reports, and other content, but they cannot create, edit, or delete any content.
Assigning and Managing Roles
Assigning the correct role to each user is critical for maintaining data security and integrity. Admins can assign roles when adding new members to a workspace or change existing members’ roles through the workspace settings.
When assigning roles, it’s important to follow the principle of least privilege, granting users only the access they need to perform their tasks. Regular audits of workspace memberships and roles can help ensure that access remains appropriate and secure.
Special Considerations for Workspace Permissions
In addition to the standard roles, Power BI also allows for row-level security (RLS), which can be used to restrict data access at the row level based on user roles. This adds an additional layer of security, ensuring that users can only access the data they are authorized to view.
Workspace permissions also play a crucial role when sharing content externally. External users must be added to your organization’s Azure Active Directory (AAD) and assigned a Power BI license before they can be added to a workspace and assigned a role.
3. Step-by-Step Guide to Setting Up Workspace Permissions
Effectively managing workspace permissions in Power BI is critical to ensuring data security and proper collaboration. Here is a detailed, step-by-step guide to help you set up and manage workspace permissions effectively.
Step 1: Create a New Workspace
- Navigate to Power BI Service: Log in to your Power BI service account.
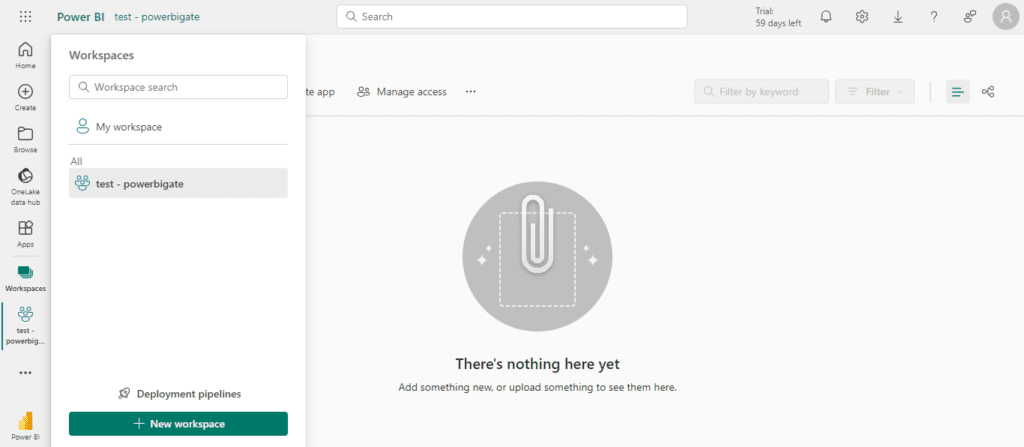
- Create Workspace: On the left navigation pane, click “Workspaces” and then “Create a workspace”. Fill in the necessary details like name, description, and advanced settings.
Step 2: Understand Workspace Types
- My Workspace: This is your personal workspace, and you have full control over it. It’s not meant for sharing content with others.
- Shared Workspaces: Designed for collaboration, this type of workspace allows you to add others and assign them roles.
Step 3: Add Members to Your Workspace
- Navigate to Workspace Settings: Once the workspace is created, go to the settings of the specific workspace.
- Add Members: Under the “Access” tab, you can add members by typing in their email addresses. You can add individuals, distribution groups, or security groups.

Step 4: Assign Roles
- Choose the Appropriate Role: Assign one of the four roles (Admin, Member, Contributor, Viewer) based on the level of access and permissions required for each user.
- Admin: Full control of the workspace.
- Member: Can edit and view content, but cannot manage workspace settings.
- Contributor: Can edit and view content, but cannot delete items they didn’t create or change workspace settings.
- Viewer: Read-only access to the workspace content.
Step 5: Set Up Row-Level Security (Optional)
- Define Roles in Power BI Desktop: In your Power BI Desktop file, go to the Modeling tab and define roles and DAX filters that specify which data is accessible by which role.
- Assign RLS Roles in Power BI Service: After publishing your report to the Power BI service, go to the dataset settings and assign the RLS roles to the appropriate users or groups.
Step 6: Validate and Test Permissions
- Validate Roles: Make sure all users have the correct roles assigned.
- Test Access: Optionally, log in as a user with limited permissions to ensure they can only access what they’re supposed to.
Step 7: Manage and Audit Workspace Access
- Regular Audits: Regularly review and audit the list of users and their roles to ensure everyone has the appropriate level of access.
- Update as Necessary: As team members’ roles within the organization change, update their workspace roles and access accordingly.
Step 8: Share and Collaborate
- Share Content: Now that permissions are set up, you can start sharing dashboards and reports, confident in the knowledge that data security is being maintained.
Step 9: Monitor and Optimize
- Monitor Usage and Access: Utilize Power BI’s usage metrics to monitor how your workspace and its content are being used.
- Optimize Based on Feedback: Gather feedback from users and optimize the workspace setup and permissions as needed.
4. Best Practices for Power BI Workspace Roles Setup
Implementing Power BI workspace roles effectively is crucial for maintaining data integrity, security, and ensuring efficient collaboration. Here are best practices to follow when setting up and managing Power BI workspace roles:
1. Principle of Least Privilege:
- Assign Minimal Access: Always assign users the minimal level of access they need to perform their tasks. This limits exposure and reduces risk.
2. Clearly Define User Roles:
- Understand Role Responsibilities: Before assigning roles, have a clear understanding of what each role can and cannot do.
- Admins: Should be limited to a few key personnel responsible for managing workspace settings, content, and memberships.
- Members: Typically for users who need to edit and collaborate on reports and dashboards.
- Contributors: Ideal for users who need to edit content but don’t need full member privileges.
- Viewers: For users who only need to view and interact with reports and dashboards.
3. Use AD Security Groups for Easier Management:
- Leverage Active Directory (AD) Groups: Instead of adding users individually, use AD groups. This makes managing access at scale more manageable and ensures consistency.
4. Regularly Review and Update Access:
- Conduct Access Audits: Periodically review who has access to what and ensure that it still aligns with their current role and responsibilities.
- Remove Inactive Users: Regularly remove users who no longer need access or have left the organization.
5. Train Users on Their Roles and Responsibilities:
- Provide Training: Ensure that all users understand their roles and responsibilities within the workspace.
- Promote Best Practices: Encourage users to follow best practices for data handling and report creation.
6. Utilize Workspace Apps for Broader Distribution:
- Use Apps for Viewing: Instead of giving view access to the workspace, publish an app and give access to that for users who only need to view content.
7. Implement Row-Level Security (RLS) When Necessary:
- Use RLS for Data Security: If your reports need to show different data to different users, implement RLS to secure data at the row level.
8. Be Cautious with External Sharing:
- Restrict External Access: Be cautious about granting access to external users. Ensure that any shared data is not sensitive or confidential.
9. Document Your Setup:
- Keep a Record: Document who has access to what, why they have that access, and any RLS roles that have been implemented. This is crucial for audits and reviews.
10. Monitor Usage and Optimize:
- Use Usage Metrics: Monitor how your workspaces and content are being used, and optimize based on this data.
Following these best practices ensures a secure, efficient, and well-managed Power BI environment. It facilitates smoother collaboration, enhances data security, and ensures that users have the appropriate level of access to perform their roles effectively. Implementing these practices also aids in compliance and makes auditing and reviewing access much simpler and more transparent.
5. Case Studies: Effective Management of Workspace Permissions
Power BI workspace permissions and roles are crucial for data governance, ensuring that the right people have the right access. Let’s explore some real-world case studies that highlight the significance of effective workspace permission management.
1. A Large Healthcare Provider Streamlines Access Control
A major healthcare organization with numerous departments and hundreds of employees needed a robust system to manage access to sensitive patient data.
Challenges:
- Diverse roles and responsibilities across departments.
- The need to comply with strict healthcare data protection regulations.
Solution:
- Implemented a structured Power BI workspace environment.
- Utilized Active Directory (AD) groups to streamline and secure access.
- Established clear roles and responsibilities, ensuring only necessary personnel had access to sensitive data.
Outcome:
- Enhanced data security.
- Simplified user management.
- Ensured compliance with healthcare data protection standards.
2. A Retail Giant Optimizes Report Sharing and Collaboration
A global retail company required a solution to share sales and inventory reports among various departments while maintaining data integrity and security.
Challenges:
- Numerous departments needing varying levels of access.
- The need for real-time collaboration on reports.
Solution:
- Defined specific workspace roles aligned with departmental functions.
- Used workspace apps for broader distribution, allowing for viewer access without workspace access.
- Regularly audited access and adjusted as necessary.
Outcome:
- Streamlined report sharing and collaboration.
- Maintained data integrity and security.
- Reduced administrative overhead in managing access.
3. A Financial Institution Enhances Data Security
A financial institution dealing with sensitive customer data needed to ensure that only authorized personnel could access and modify financial reports.
Challenges:
- High sensitivity of financial data.
- Varied access requirements for different roles.
Solution:
- Implemented a Power BI workspace with clearly defined roles.
- Utilized row-level security (RLS) to ensure data could only be accessed by authorized personnel.
- Regular training and documentation to keep all users aware of their responsibilities.
Outcome:
- Enhanced data security and integrity.
- Ensured only authorized personnel had access to sensitive data.
- Maintained a clear and auditable trail of access and modifications.
These case studies underscore the importance of effectively managing Power BI workspace permissions and roles. Whether it’s a healthcare provider ensuring compliance and data security, a retail giant optimizing report sharing, or a financial institution enhancing data integrity, proper workspace management is key. By implementing structured access control, utilizing tools like AD groups, and regularly auditing access, organizations can ensure data security, streamline collaboration, and reduce administrative overhead.
6. Conclusion
Navigating the complexities of Power BI workspace permissions and roles can be a challenging yet rewarding endeavor. As we’ve explored throughout this article, having a deep understanding and strategic approach to setting up and managing these permissions is crucial for maintaining data integrity, ensuring security, and facilitating efficient collaboration.
Key Takeaways:
- Structured Approach: Adopting a structured and thoughtful approach to setting up workspace permissions is vital. This ensures that each user has the appropriate level of access, aligning with their role and responsibilities within the organization.
- Leveraging Power BI Roles: Effectively utilizing the various roles available within Power BI, such as Member, Contributor, and Admin, can significantly enhance data governance. It allows for a fine-grained control over who can view, edit, or manage the data and reports.
- Best Practices: Following best practices for workspace role setup, including regular audits and reviews of access levels, ensures that the system remains up-to-date and secure. This proactive approach helps in preventing unauthorized access and potential data breaches.
- Training and Documentation: Providing adequate training and comprehensive documentation for all users, irrespective of their role, fosters a culture of accountability and data stewardship. It ensures that every user understands the importance of data governance and their role in maintaining it.
- Real-World Applications: The case studies highlighted in the article serve as a testament to the transformative impact of properly managed workspace permissions. From healthcare and retail to finance, organizations across various sectors have leveraged Power BI workspace permissions to enhance data security, streamline operations, and facilitate data-driven decision-making.
- Embracing Change: The landscape of data governance is continually evolving. Staying abreast of the latest updates in Power BI and being willing to adapt and refine your approach to workspace permissions is essential for maintaining a robust data governance strategy.
- Empowering Users: Ultimately, the goal of managing workspace permissions is to empower users. Providing them with the right level of access enables them to perform their roles effectively, leading to enhanced productivity and innovation.
In summary, mastering Power BI workspace permissions is a critical component of data governance. It requires a strategic approach, a deep understanding of the available roles and permissions, and a commitment to regular review and management. By doing so, organizations can ensure the security of their data, foster a culture of accountability, and unlock the full potential of their data-driven initiatives.
Whether you are a Power BI administrator, a data steward, or an end-user, embracing the principles and practices outlined in this article will set you on the path to achieving optimal data governance and unleashing the transformative power of Power BI in your organization.